Chinese New Year Bracelet: Make a Lunar New Year Red String
By Daozhang MaMaoshan Taoist, Jintan, Jiangsu
In short
You can tie a Chinese New Year bracelet at home from two lengths of wine-red cord and some fine thread, and it comes out as a slim red string with a ruyi knot at its center. It’s an intermediate project of 10 steps, and I’d allow an hour or two the first time, which is my rough guess rather than a measured time.
Lunar New Year bracelets also come as gold charms and beaded pieces, but this is the knotted red kind, worn over the holiday or through a benmingnian (本命年), the year your own zodiac animal comes back. The one skill to get right is tight thread wrapping, because both the closing loop and the ruyi knot depend on it. Materials come first, then the knots in the order you tie them.
What You Need for a Ruyi Red String Bracelet
The whole bracelet uses two weights of the same wine-red thread, plus something to hold the work still.
- Main cord: two lengths of 18-ply wine-red cord, 51 in (1.3 m) each. Ply means how many fine threads are twisted into one cord, so 18-ply (18股) is the heavier of the two.
- Wrapping thread: 3-ply wine-red thread, the fine one that winds around the main cord. You’ll use it twice, so keep the spool beside you.
- A metal clip: fixed to a board or table edge, so the strands can pull against something.
- Small sharp scissors: for trimming thread flush against the coils.
- A lighter: for melting the cut ends at the very end.
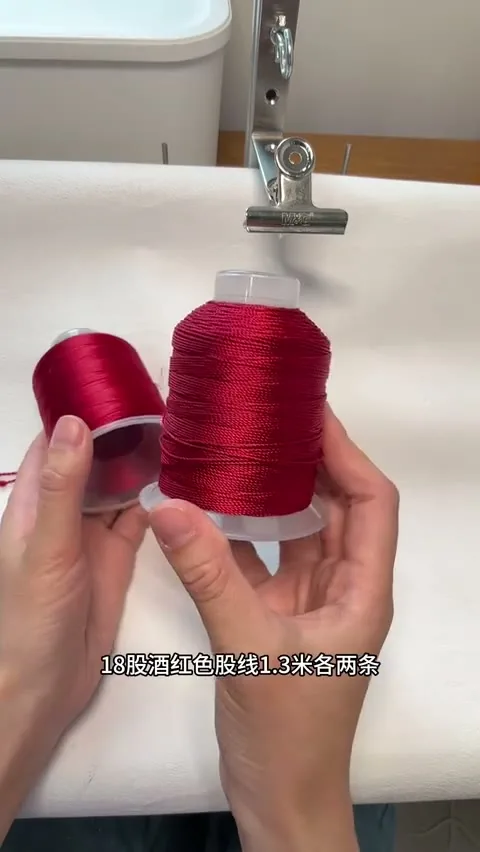
I can’t give you a label diameter for the 18-ply. Judging by the cord against a fingertip, it looks roughly 0.04 in (1 mm) thick, so treat that as an estimate and pick something close if your shop doesn’t list ply numbers.
This page sticks to the knotted cord. Gold bangles and longevity locks belong to a separate family, and Chinese New Year jewelry sorts those out piece by piece.
Step 1: Read the Knots on This Chinese New Year Bracelet
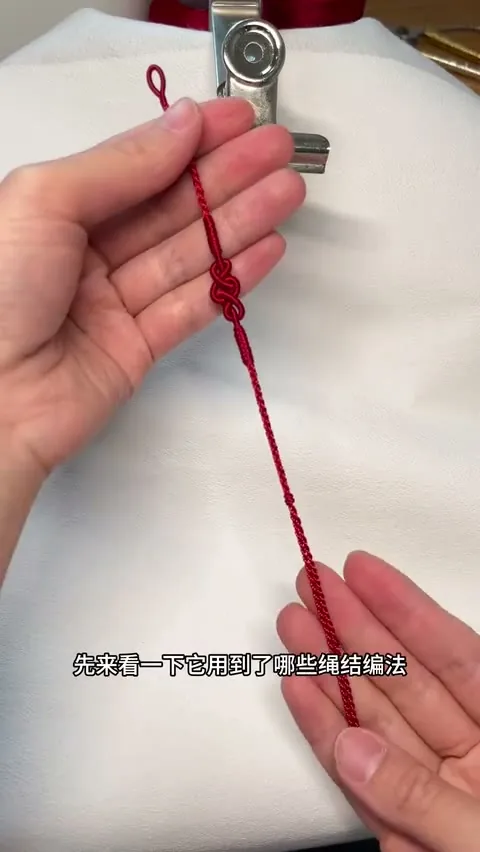
Before you cut anything, read the bracelet from top to bottom, since each section builds on the one before it. It opens with a wrapped loop, runs through a four-strand braid and a short stretch of diamond knots, and reaches the ruyi knot in the middle. The diamond knots and braid then repeat in mirror order, and two thin twisted tails finish it off.
- Wrapped loop: a small closed eye made by winding thread over the cords, with no visible join.
- Four-strand braid: a narrow braid worked by taking the outer strand from each side in turn.
- Cored diamond knot (jingang jie, 金刚结): a bead-like knot tied with the two outer strands around the others, which run through its middle as a core.
- Ruyi knot (如意结): the centerpiece. Ruyi means “as you wish,” so the bracelet carries that wish at its center.
- Snake knot (she jie, 蛇结) and dimple knot (jiuwo jie, 酒窝结): small locking knots. The dimple knot is tied like the snake knot with every wrap doubled.
- Mo xiang li closure (莫相离, “don’t part”): the join between the tails and the loop.
Step 2: Wrap the Seamless Loop at the Start
The closure will hang on this small eye, so go slowly and keep every coil tight.
Fold the two 18-ply lengths in half together and find the middle. Measure about 3/8 in (1 cm) to the right of the middle, because that’s where the wrapping starts.
Take the 3-ply thread and clip one end, leaving a tail of a little over 4 in (10-plus cm). Start wrapping in the reverse direction, back across the middle of the cords. After a short stretch, push the coils to the right so they pack tight, then keep wrapping until the coils measure about 3/4 in (2 cm).
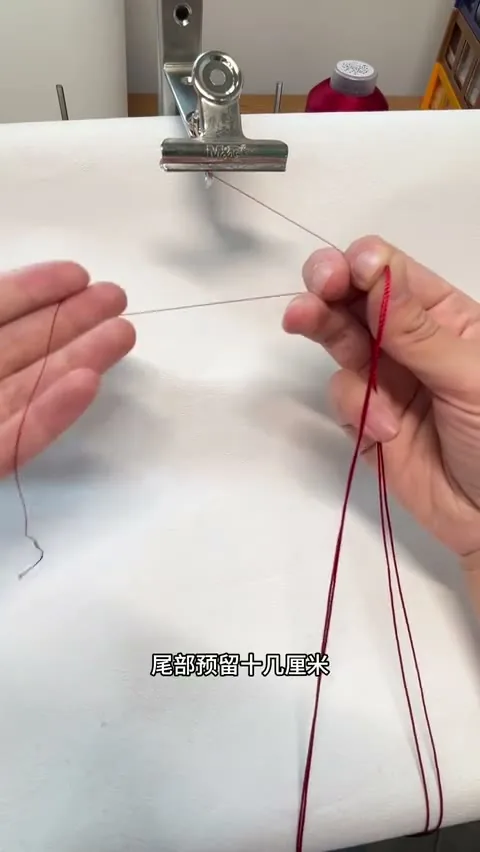
Fold the coils in half and pinch them, which turns the wrapped part into the loop. Find the 3-ply tail you left and fold its end back into a U.
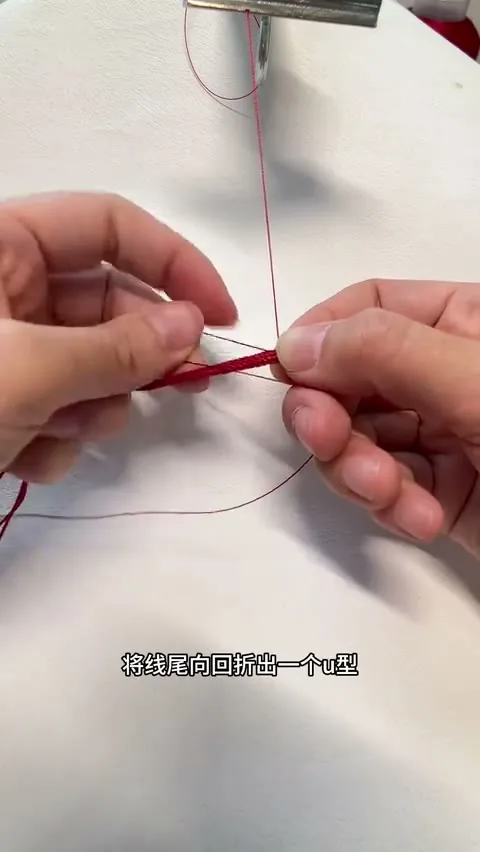
Hold that U against all the cords and keep wrapping upward over them for about 3/16 in (5 mm). Cut the wrapping thread, pass its end through the U, and press the end down firmly.
Now pull the thread end on the other side, which draws the left-hand thread in under the coils. Trim the extra flush with your scissors, and the join disappears.
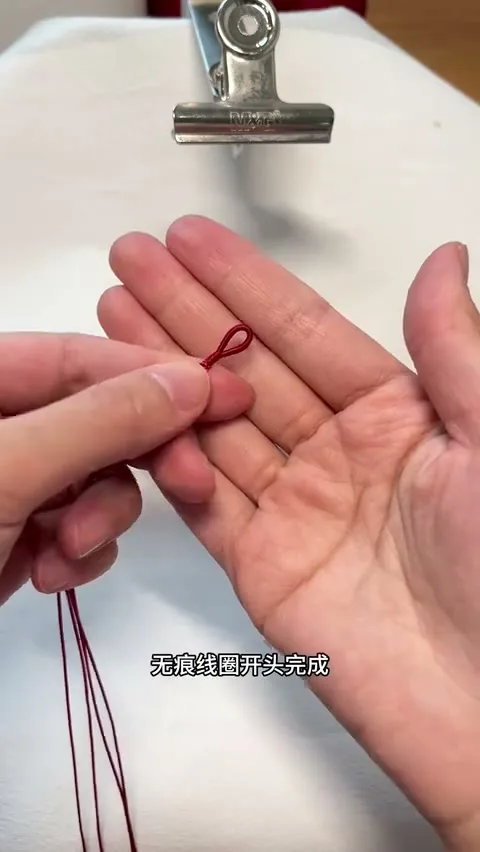
Step 3: Braid the First Four-Strand Section
With the loop closed, the four cord ends become your braiding strands, so anchor the work in the clip. Split them into two on the left and two on the right, then cross the middle two strands to give the braid a clean start.
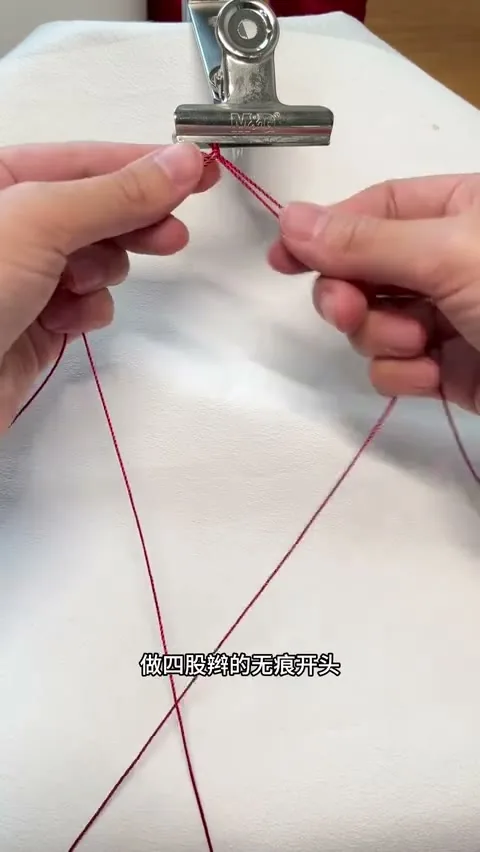
Take the outermost strand on the right and bring it behind the work to the left. Lift the outermost left strand away, pull your strand out between the two left strands, and return it to the right.
Now mirror that move. Take the outermost strand on the left, lift the outermost right strand away, and bring your strand behind to the right. Pull it out between the two strands there and return it to the left, which completes one cycle.
Keep alternating right and left until the braid is long enough. This bracelet has 1 3/8 in (3.5 cm) here, and this is the length to change for your own wrist.
Step 4: Tie the Cored Diamond Knots
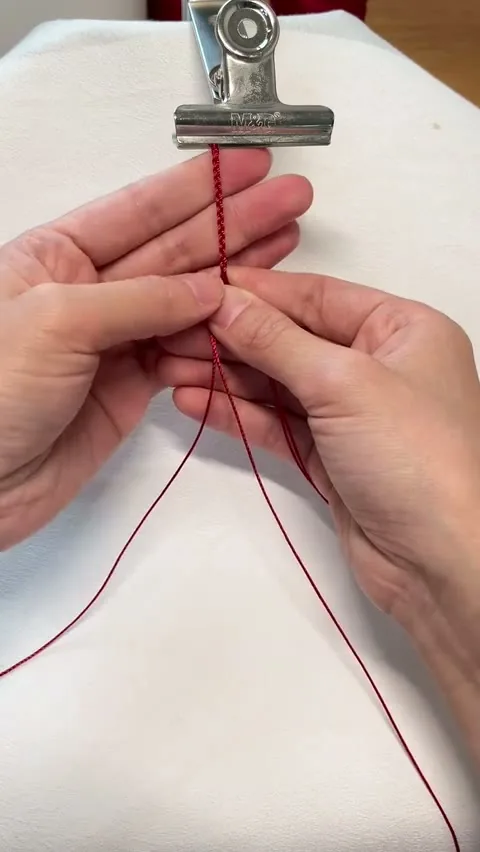
The braid stops here, and the texture changes to bead-like knots tied around the remaining strands. Take the two outermost strands. Wind the lower strand once around your thumb and the upper strand once around your index finger, then pass the upper strand through the loop on your thumb and pull it out. Tighten the lower strand.
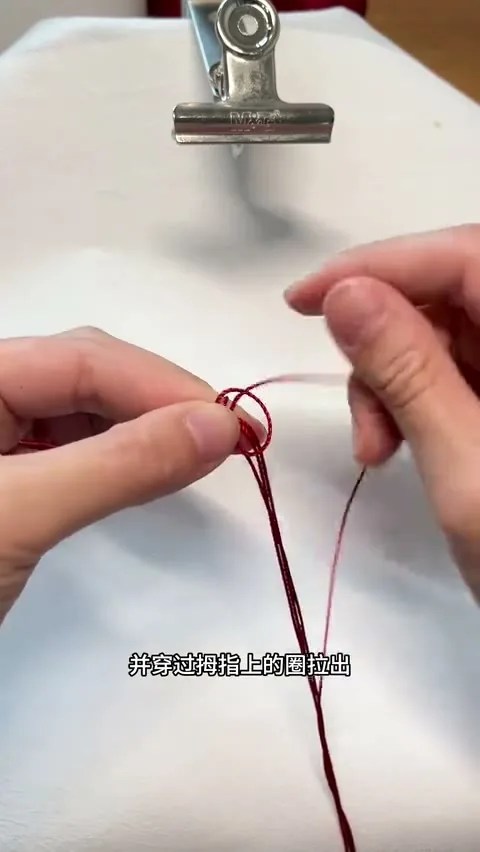
Pinch all the strands and turn them 180 degrees so the loop faces up. Wind the upper strand once around your index finger, pass it through the loop on top, and tighten the lower strand. That’s one diamond knot.
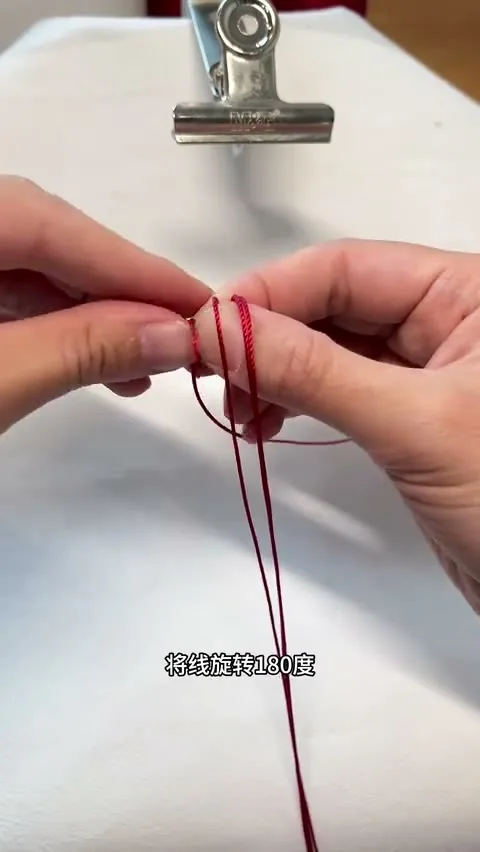
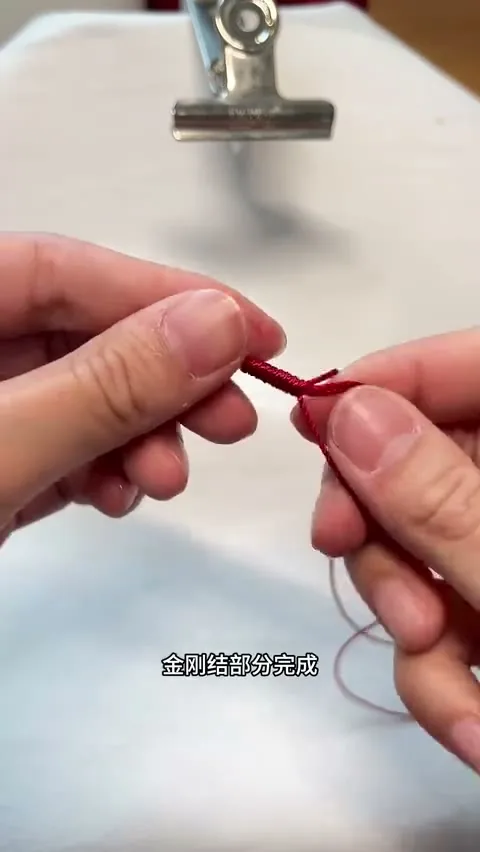
Flip the work again so the loop faces up. Wind the upper strand around your index finger, pull it through the loop that’s already there, and tighten the lower strand. Repeat that flip and pull until the knots cover 3/8 in (1 cm), then give the lower strand one last tug.
Step 5: Wrap the Long Cord and Tie the Ruyi Knot
The ruyi knot isn’t tied from loose strands, so the next job is wrapping them into one firm cord. Take the 3-ply thread, leave a tail of about 8 in (20 cm), and wrap just as you did at the start. The wrapped length should reach 3 1/2 to 3 3/4 in (9 to 9.5 cm).
If the first coils don’t sit hard against the knots, pull each cord tight one at a time and the gap closes. Keep wrapping until 3/8 in (1 cm) remains, fold the thread tail upward, and wrap the last 3/8 in (1 cm) over it. Cut the thread, pull the end tight, and trim it flush.
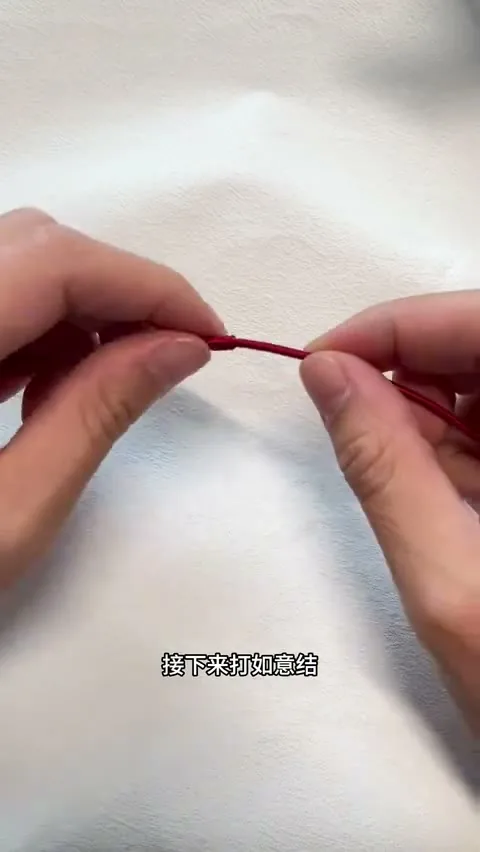
Make a loop in the wrapped cord, pointing up. Fold a U in the cord, pass the U through the loop, and pull the loop closed around it.
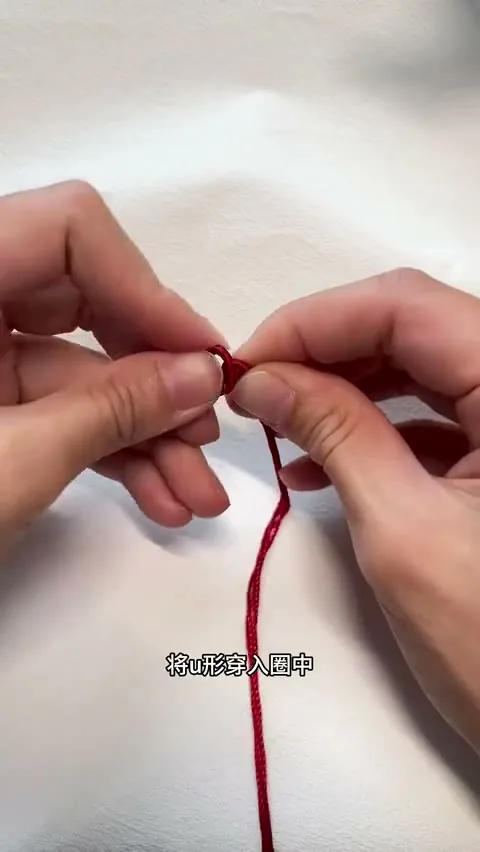
Pass the tail of the cord from back to front through the second loop.
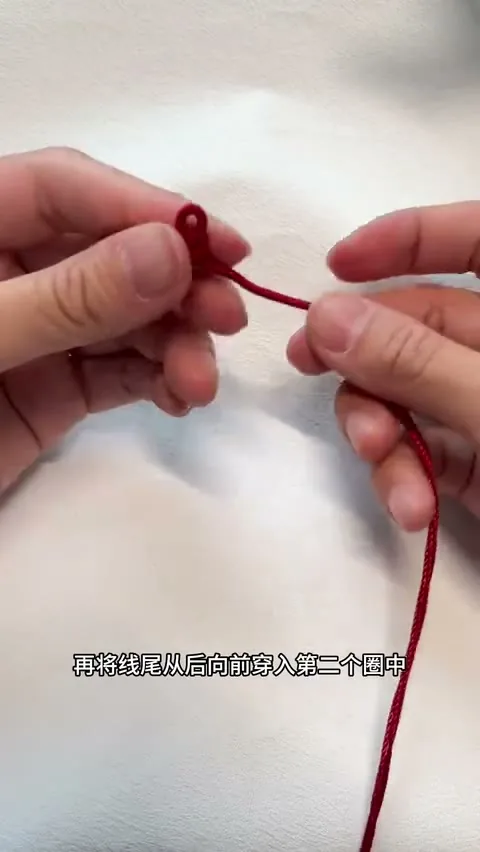
That pass leaves you with a third loop. Check that you can see it before you move on, because the last two moves both work on it.
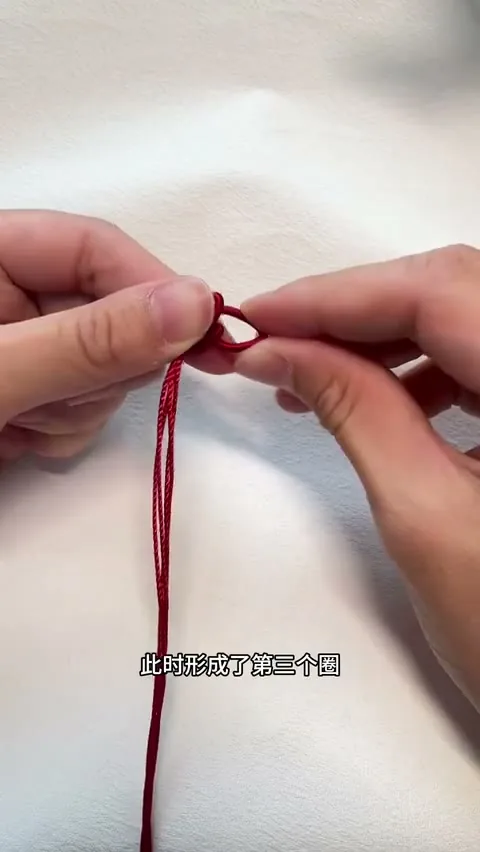
Twist the third loop 180 degrees upward, then pass the tail from front to back through this last loop.
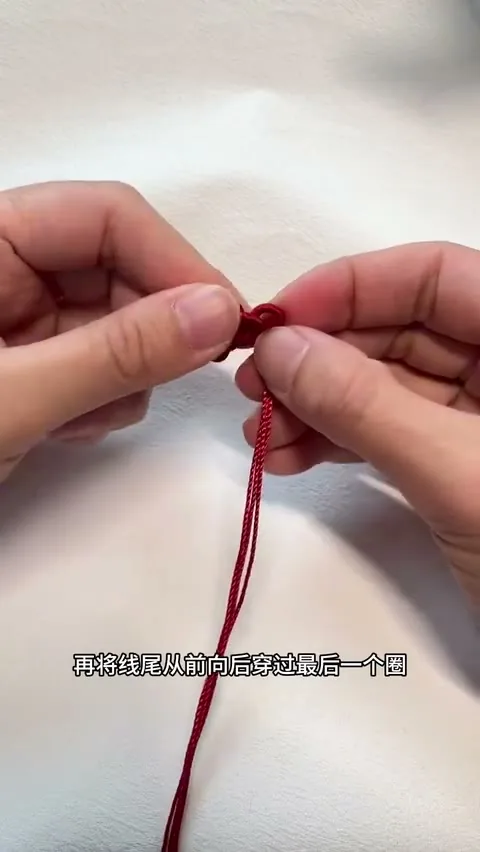
Ease the loops into shape until the knot sits evenly on the cord, and the ruyi knot is done.
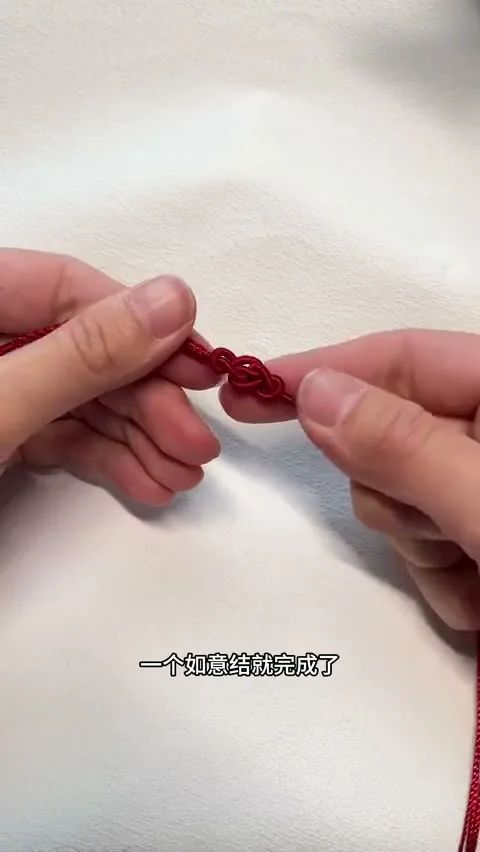
Step 6: Repeat the Diamond Knots and Braid After the Ruyi Knot
Past the ruyi knot, the second half mirrors the first, so there’s no new technique to learn. Tie a run of cored diamond knots as in Step 4, then a four-strand braid as in Step 3. Match the lengths of the first half so the ruyi knot stays in the middle.
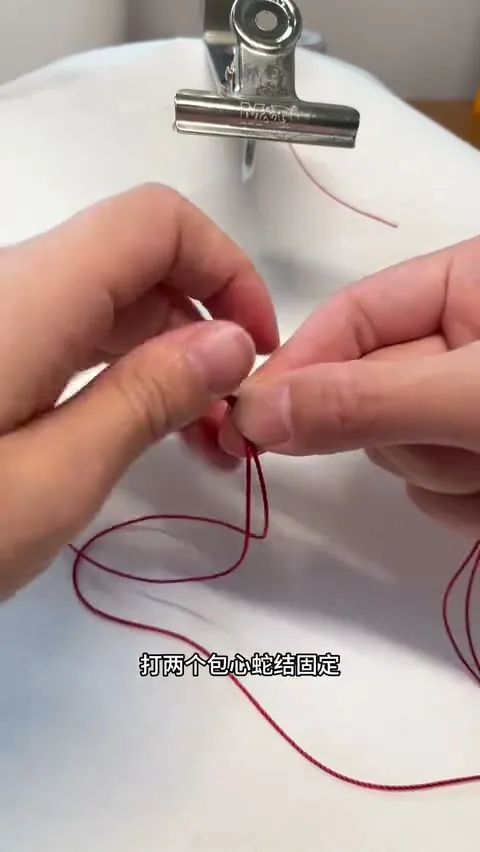
Step 7: Lock the Braid With Two Cored Snake Knots
A finished braid will loosen unless something holds it, and two snake knots do that job. Take the two outermost strands, wind the lower strand once around your thumb, and wind the upper strand once around your index finger. Pass the upper strand through the loop on your thumb and pull it out, then tighten the upper and lower strands together.
That’s one snake knot, and you’ll notice the start matches the diamond knot. Tie a second one the same way.
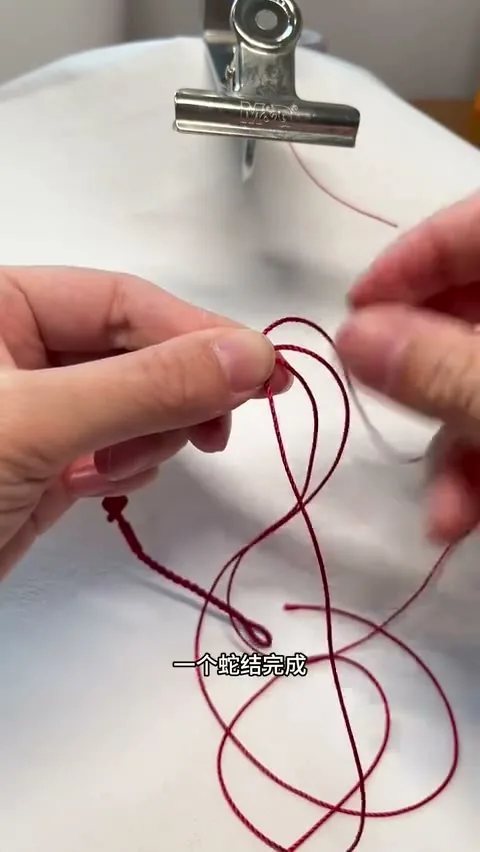
Step 8: Twist the First Two-Strand Tail
Four strands are left after the snake knots, and they become two thin tails of two strands each. Take the two strands on the left. Twist each one in the same direction while you wind the pair around each other in the opposite direction, and the two forces lock into a cord.
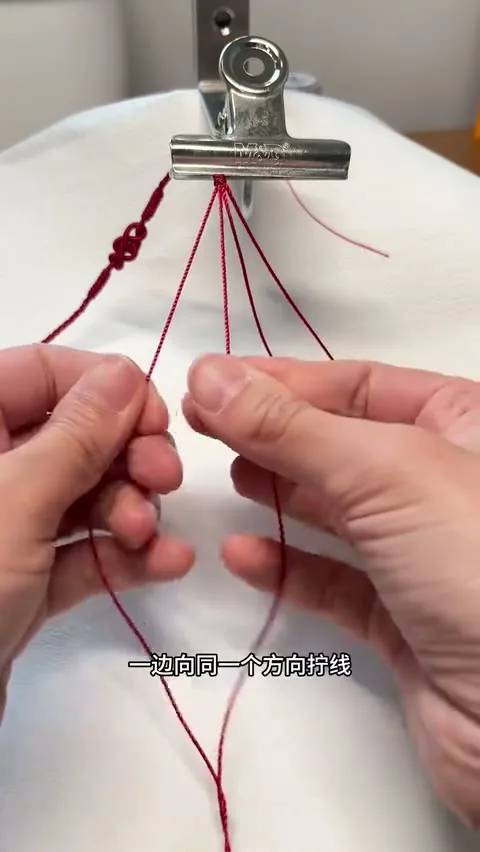
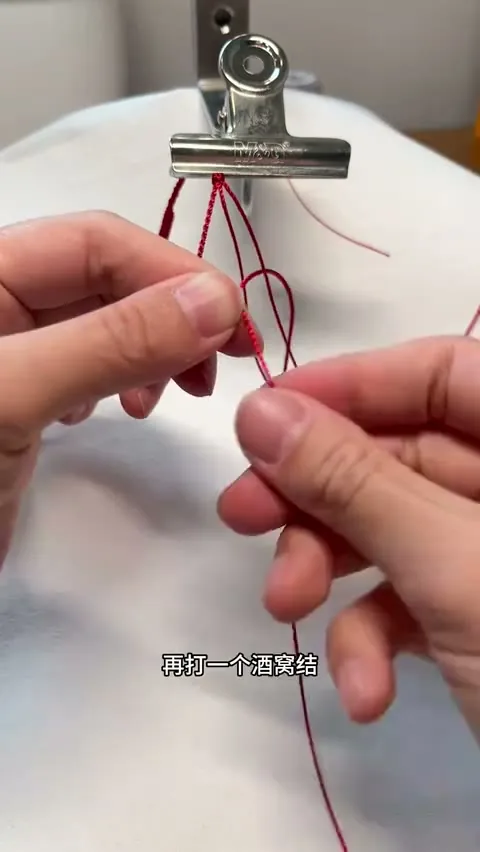
Twist 3 1/2 in (9 cm) of tail. End it with a snake knot tied as in Step 7, then add a dimple knot, which ties the same way except that every wrap goes around twice. Pull all the strands tight.
Step 9: Finish the Second Tail and Melt the Ends
The second tail is a straight repeat of the first. Twist the remaining two strands the same way, to the same length, with the same two knots at the end. Then cut the cord ends and melt them with the lighter so they can’t fray, touching the flame to the end for a moment and keeping your fingers clear of the hot bead.
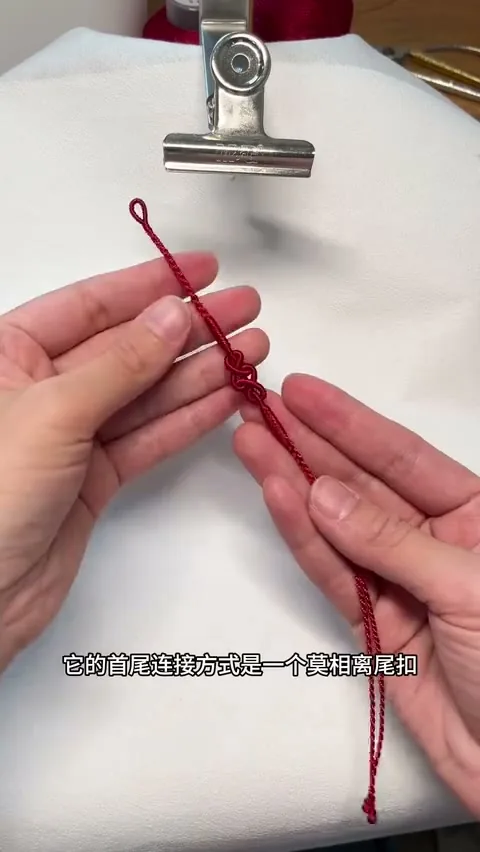
Step 10: Join the Ends With the Mo Xiang Li Closure
Now the loop from Step 2 gets its job, because the tails close the bracelet through it. Pass the tails into the loop and take them back around once.
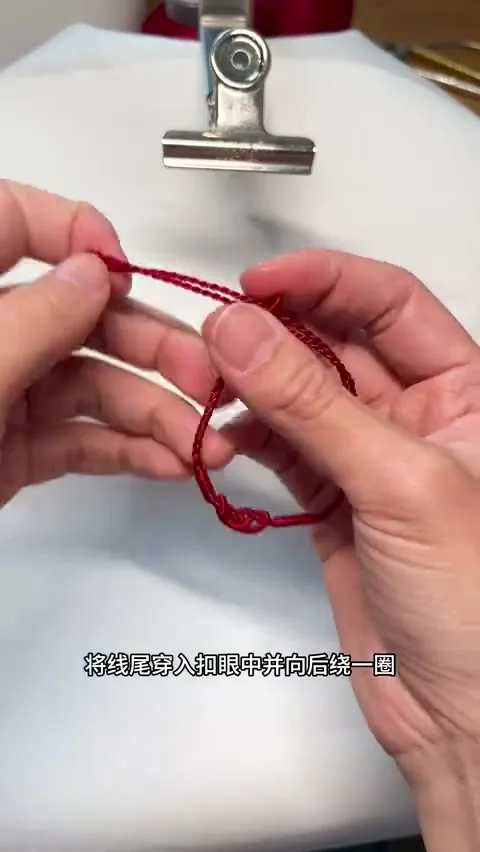
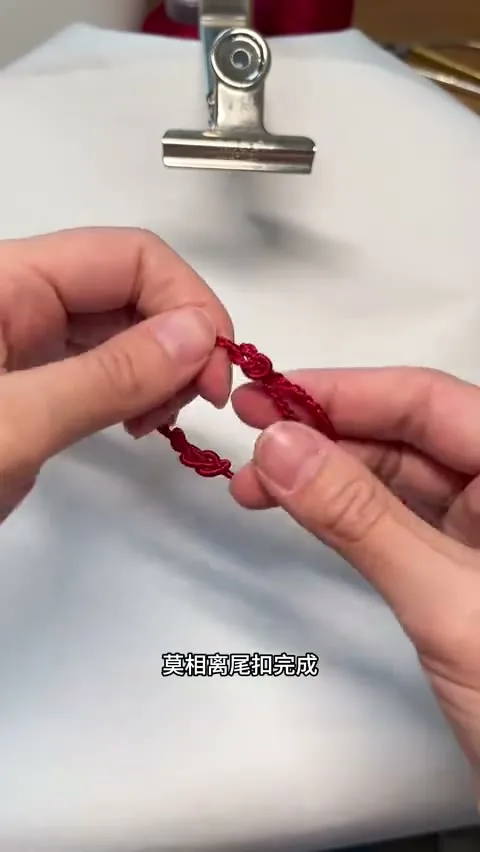
Pass them back through the loop in the opposite direction, then tug gently until the closure sits neatly. The two knotted tails stick out side by side, and the bracelet is finished.
Tips for Sizing and Fixing a Ruyi Red String
These notes aren’t part of the 10 steps; they’re the things I’d tell a friend before they started.
- Sizing: change both four-strand braids by the same amount. Adjusting only one pushes the ruyi knot off center.
- Gaps in the coils: stop and push them together while the thread is still uncut. After you trim, there’s no easy way to close them.
- Uneven ruyi loops: ease one loop at a time instead of hauling on the tail, which locks the knot in its lopsided shape.
- Cord that won’t melt: melting works on synthetic cord. Cotton chars instead, so use a tiny dab of clear glue on a cotton end.
- Wear: a cord worn day and night fades and frays within months. That’s normal, and it isn’t a bad sign.
Another Style of Lunar New Year Bracelet: The Thicker Red Band
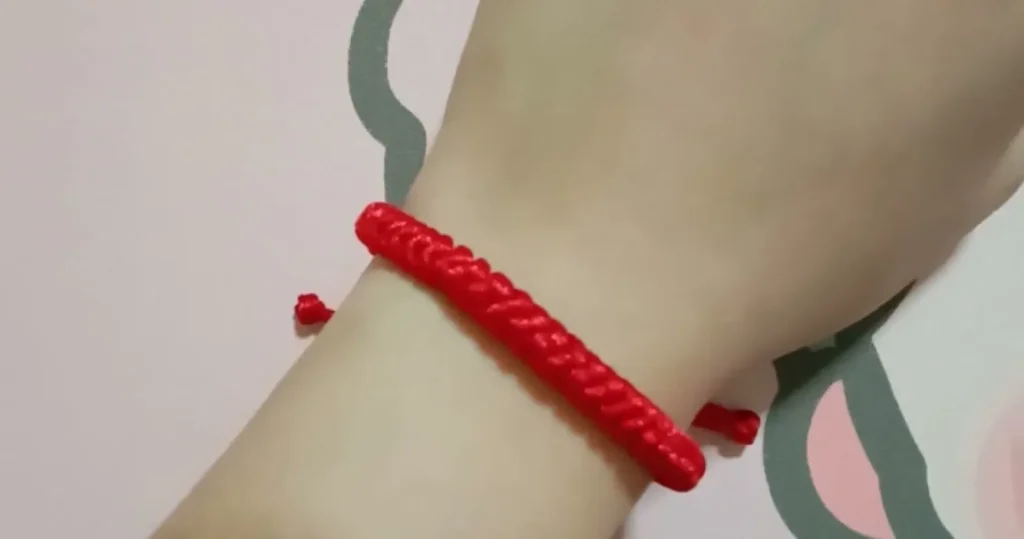
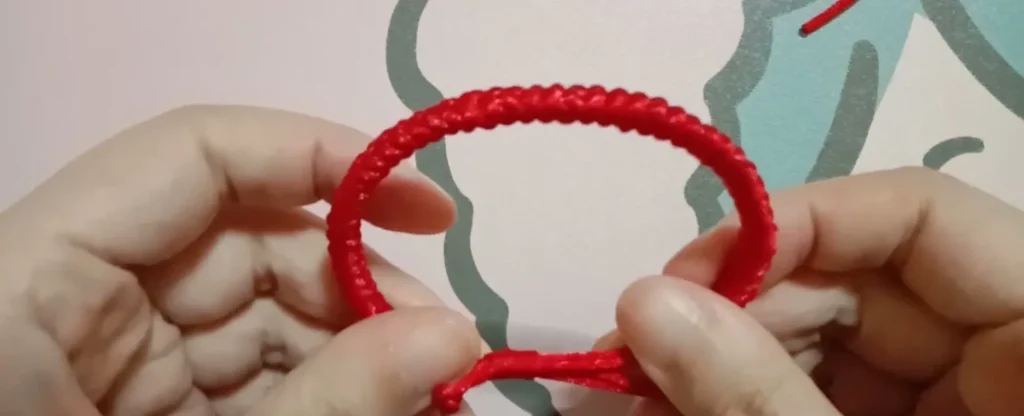
Not every red bracelet looks like the slim ruyi string, and you may have noticed the chunkier one at the top of this page. That one is a thick band of knots with its two ends meeting at a small closure. It’s a different bracelet from the steps above, with no ruyi knot and no twisted tails, and I’d give it to someone who wants the red to show from across the room.
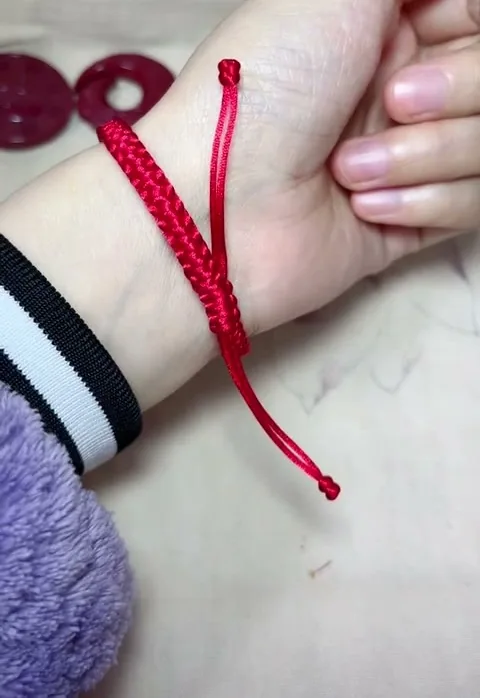
Plainer bands like the one below are worn the same way, with the cord ends left hanging at the wrist. Pick whichever you’ll actually keep on, since a bracelet in a drawer does nothing for anyone.
If tying isn’t for you, ready-made cords and the versions with a gold luck-turning bead are in my Chinese zodiac gifts guide.
Why People Wear a Red Bracelet for Chinese New Year
Whichever style you choose, the reason for wearing one comes down to the color and the calendar. Red is the color of the holiday, and a cord is the easiest red there is to wear. On Maoshan I see more red cords on wrists in the weeks around New Year than at any other time. A bracelet like this suits the holiday itself, and it suits a benmingnian just as well.
In a benmingnian, tradition asks for more red than usual. The Year of the Goat starts on February 6, 2027, so that means most people born in 1967, 1979, 1991, 2003 or 2015. If your birthday falls in January or early February, check the New Year date for your birth year. You can start from the twelve signs on the Zodiac and Tradition home page.
I don’t know of any rule that makes this a man’s or a woman’s piece, and a slim cord looks fine on either. A red cord won’t change your year, and I won’t tell you it will. It’s a wish you can wear.
When a friend’s benmingnian comes around, I still suggest a red string, given in person. A common saying holds that the cord works best when someone else ties it on for you, so a bracelet you knotted yourself makes a good present.
Hand it over the way any New Year gift is handed over, with both hands and a few words of good wishes. The wider holiday, from the Eve to the last day, has its own Lunar New Year overview.
Written by

Daozhang MaMaoshan Taoist, Jintan, Jiangsu
Daozhang Ma is a Maoshan Taoist who has practiced for 22 years and is skilled at writing talismans and painting Taoist pictures. He runs Zodiac & Tradition.
About Daozhang Ma